God and Nature Spring 2019

By Mark Anthony Rivera
If I could meet anyone in history, it would have to be Jesus of Nazareth. The Bible gives us His words, but not
the inflection, tone, or manner with which He spoke them. And what facial expressions did He have as He spoke? In fact, what did He actually look like?
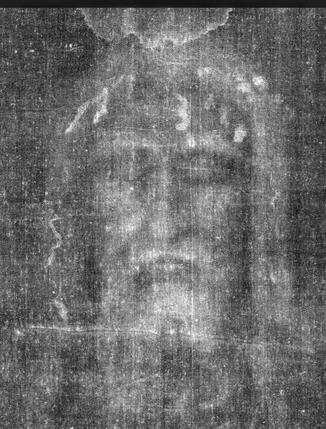
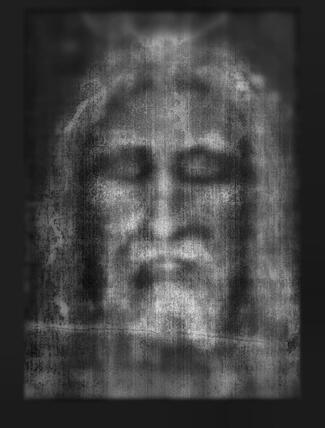
I am one who believes that the Shroud of Turin is the actual burial cloth of Christ. As such, I’ve turned to this artifact, and my own modest skills, to set about producing portraits of what Jesus might have looked like. Herein I will describe three of the ways I have attempted to do just that. The first and most direct way is to sketch directly on top of the Shroud image what my mind’s eye sees when I look at it. To start with, I performed several layers of noise reduction and image enhancement on the facial image. The figure below shows the original image on the left and my final enhanced image on the right.
Image #1
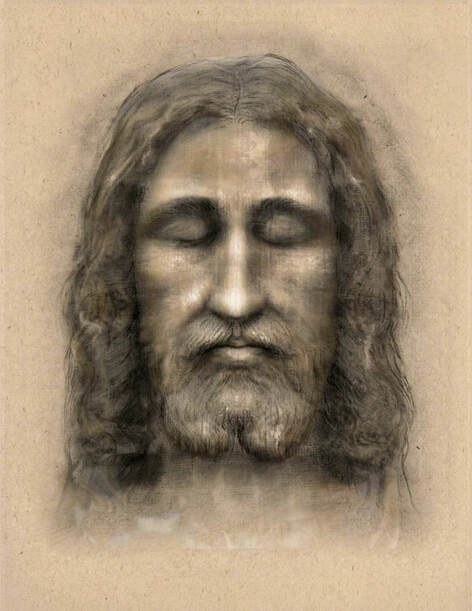
Starting with a lightly printed copy of the enhanced image, I simply sketched directly on top of this image what my mind’s eye wants to interpret when I look at it. After several sketches and re-sketches, re-combining tone with the shroud image each time, I arrived at the image you see above.
Image #2
Image #2
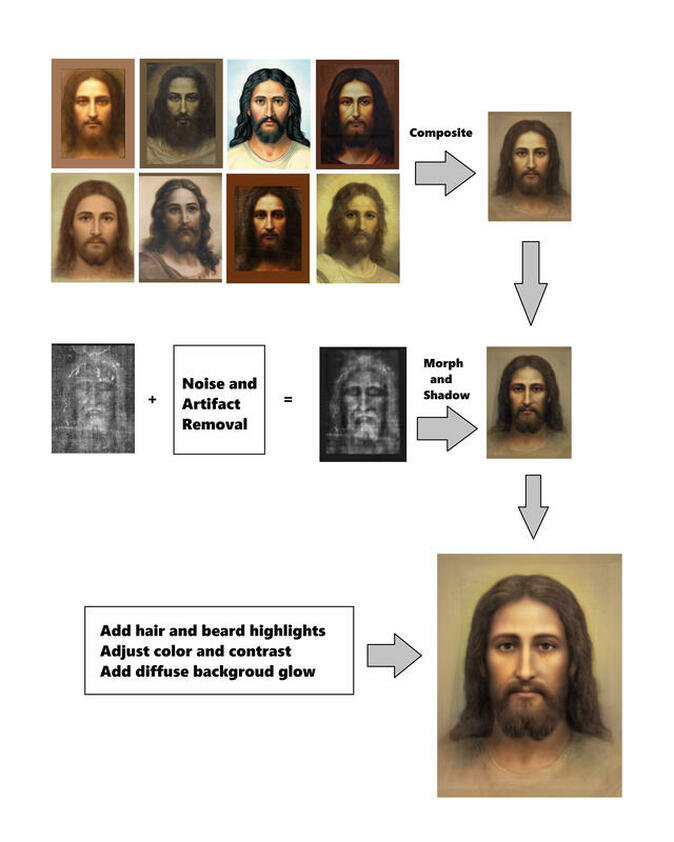
As a second means of producing a portrait, I turned to other artistic renderings of Jesus. Knowing that each of these renderings is a single artist’s interpretation, I decided to combine what I considered to be the best renderings, at least in terms of fidelity to what I saw as the facial proportions on the Shroud.
The figure on the left illustrates the work flow of how I produced a digital portrait of Jesus from other artists, again relying on the image in the Shroud to guide proportions and tone.
I began with an internet search using the tag “portraits of Jesus." Being familiar with the facial proportions on the shroud of Turin, I found and selected eight images that were very close to those proportions. The eight images are shown in the illustration. All eight images were blended together into one composite image using a morphing program. This program allows one to average faces in various proportions of shape and color. I then took this averaged image and morphed it to more precisely fit the Turin Shroud facial proportions. I used a cleaned-up version of the shroud image, which I had produced earlier. I also shadowed the image according to the shadowing found on the shroud image. The final image was made more visually appealing by adding hair and beard highlights and a diffuse background glow (golden light halo), and by adjusting color vibrancy and contrast.
Image #3
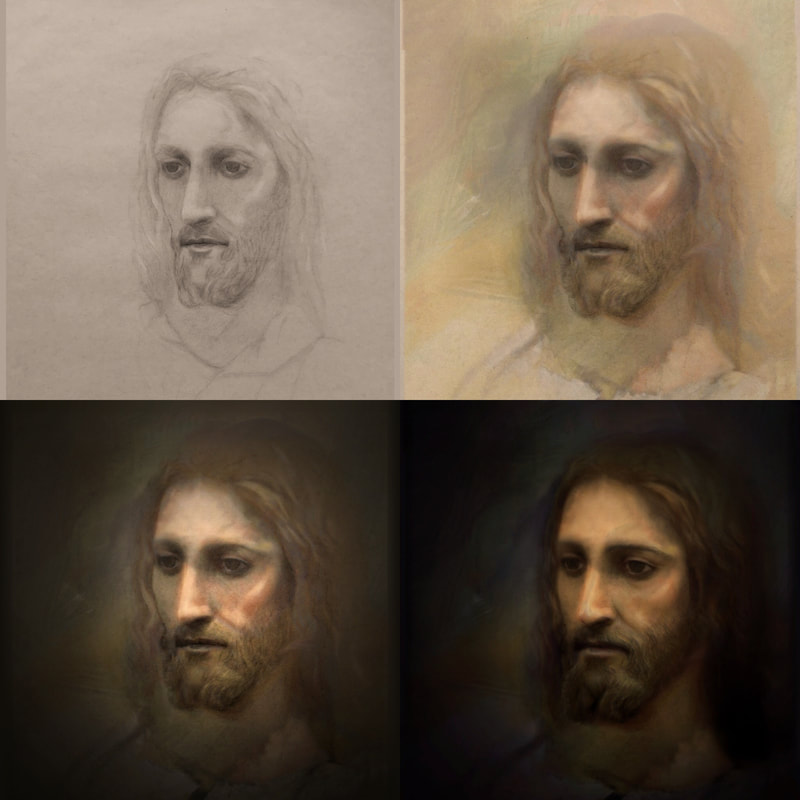
In this third effort I did not directly utilize the image on the Shroud, but I allowed my knowledge of this image to influence my artwork.
The four images above show the stages of a digital art piece that I produced over a period of a few weeks. The work began with a rough pencil sketch shown in the upper left quadrant. I digitized my pencil sketch by simply taking a photo of it, and I used a paint program to begin adding pastel colors and more shadowing (upper right). Then I decided to include a vignette darkening all around the head. This created the appearance of a glow about the face and head (lower left).
With a paint program, I was able to locally adjust shadowing and highlights on different size scales. This allowed me to achieve a desired lighting effect. I deepened some of the facial shadowing to make a light source appear to be coming from above the face and slightly in front. After some skin tone adjustments, color saturation adjustments, and making a stronger jawline by warping, the result is what you see in the lower right image.
With digital artwork, one can do experimentation and re-work. I find this much more difficult with pencil and paper alone. I usually begin with a pencil sketch and transition it to digital work, where I have much more freedom to play. if any readers would like a digital file of any of these portraits, please send a request to me at [email protected].
Mark A. Rivera is a retired physicist who worked for 35 years developing advanced technologies for commercial and military space systems. He has a master of science in physics from California State University at Long Beach and a bachelor of science in applied physics from the University of California at Irvine. His personal interests include philosophy of ethics and political science. Politically, he holds to voluntarism and social plurality. Religiously, he considers himself a “liberal and open-minded Christian."

